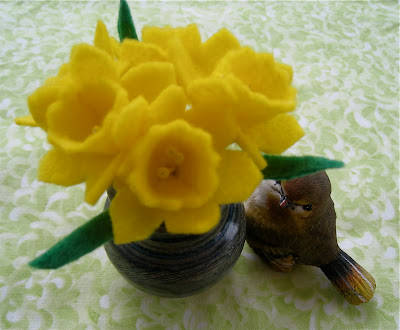
I'd like to share this design with you - a pattern I created many years ago. It can be
made with paper or felt, but I thought felt would be best for this tutorial. Please feel free to
print and enlarge the pattern and use it however you'd like!
You will need: yellow and green felt, flower stamens (from a craft store),
craft glue, a needle and yellow thread, and green florist's tape
First, cut the pattern out of yellow felt, using pinking shears where indicated.
Cut an X in the center of the blossom.
You'll also need 4 stamens, twisted together, from a craft supply store.
Put some craft glue on the bottom of the trumpet piece, lay the stamens on it
and have your needle and thread ready.
Pinch the sides of the trumpet together and slip stitch the entire side closed. You can
then pinch the bottom even more and shape and open the trumpet with your fingers.
Slip the bottom of the trumpet through the X in the blossom and pull it up.
Wind florist's tape around the bottom of the trumpet and the stamens.
If you would like the stems to be longer, twist a piece of cloth covered wire
around the bottoms of the stamens before wrapping in florist's tape.
You could pin one daffodil to your lapel with a corsage pin,
or cluster a few together for a bouquet as I did.
I found a perfect little pot to put my bouquet in, after cutting a few narrow
green leaves from felt, and I held the bouquet straight in the pot by adding a few
pebbles for stability.
This is only my second tutorial. My first was for a lace bird, which I made back
in 2009. I enjoy creating my own patterns and designs and
hope to make more and share them with you. Hope this one was
clear and that you'll try a daffodil or two for yourself!!
Happy Creating!


